Setup and configuration
Setup
Follow these steps to set up a workflow using a KYB template.
In the Settings menu, select Workflows. The Workflows page is displayed.
Select the Workflow templates tab.
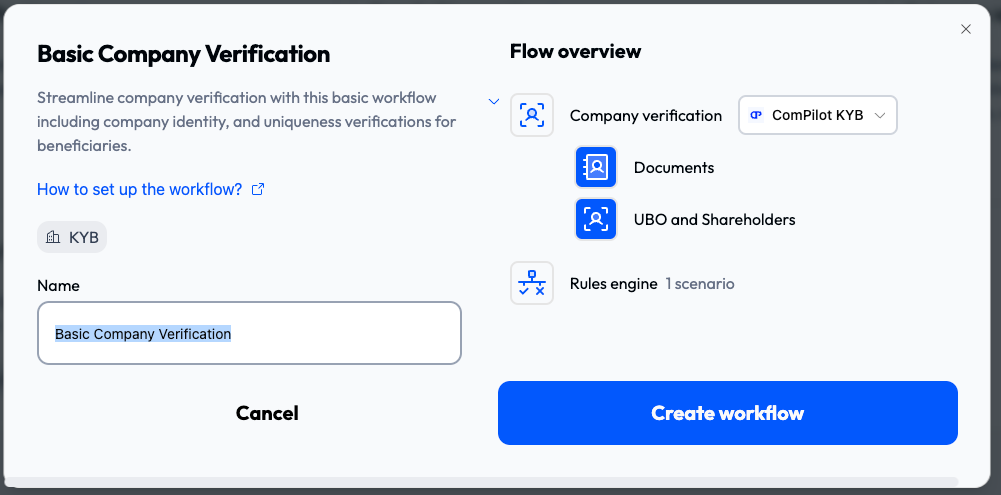
Click one of the KYB workflow templates (Basic Company Verification , and Extended Company Verification). The workflow creation modal is displayed.

This modal lists the provider types used and shows an overview of the flow.
In the Name field, enter the name of the workflow.
In Flow overview, select which providers the steps use. Not all steps require a provider and you can connect new providers if necessary.
tipIf you connect a new provider, a pane opens on the right side of the screen where you enter the provider details. Connection instructions for each provider are in Providers.
Click Create workflow. The workflow configuration page is displayed.

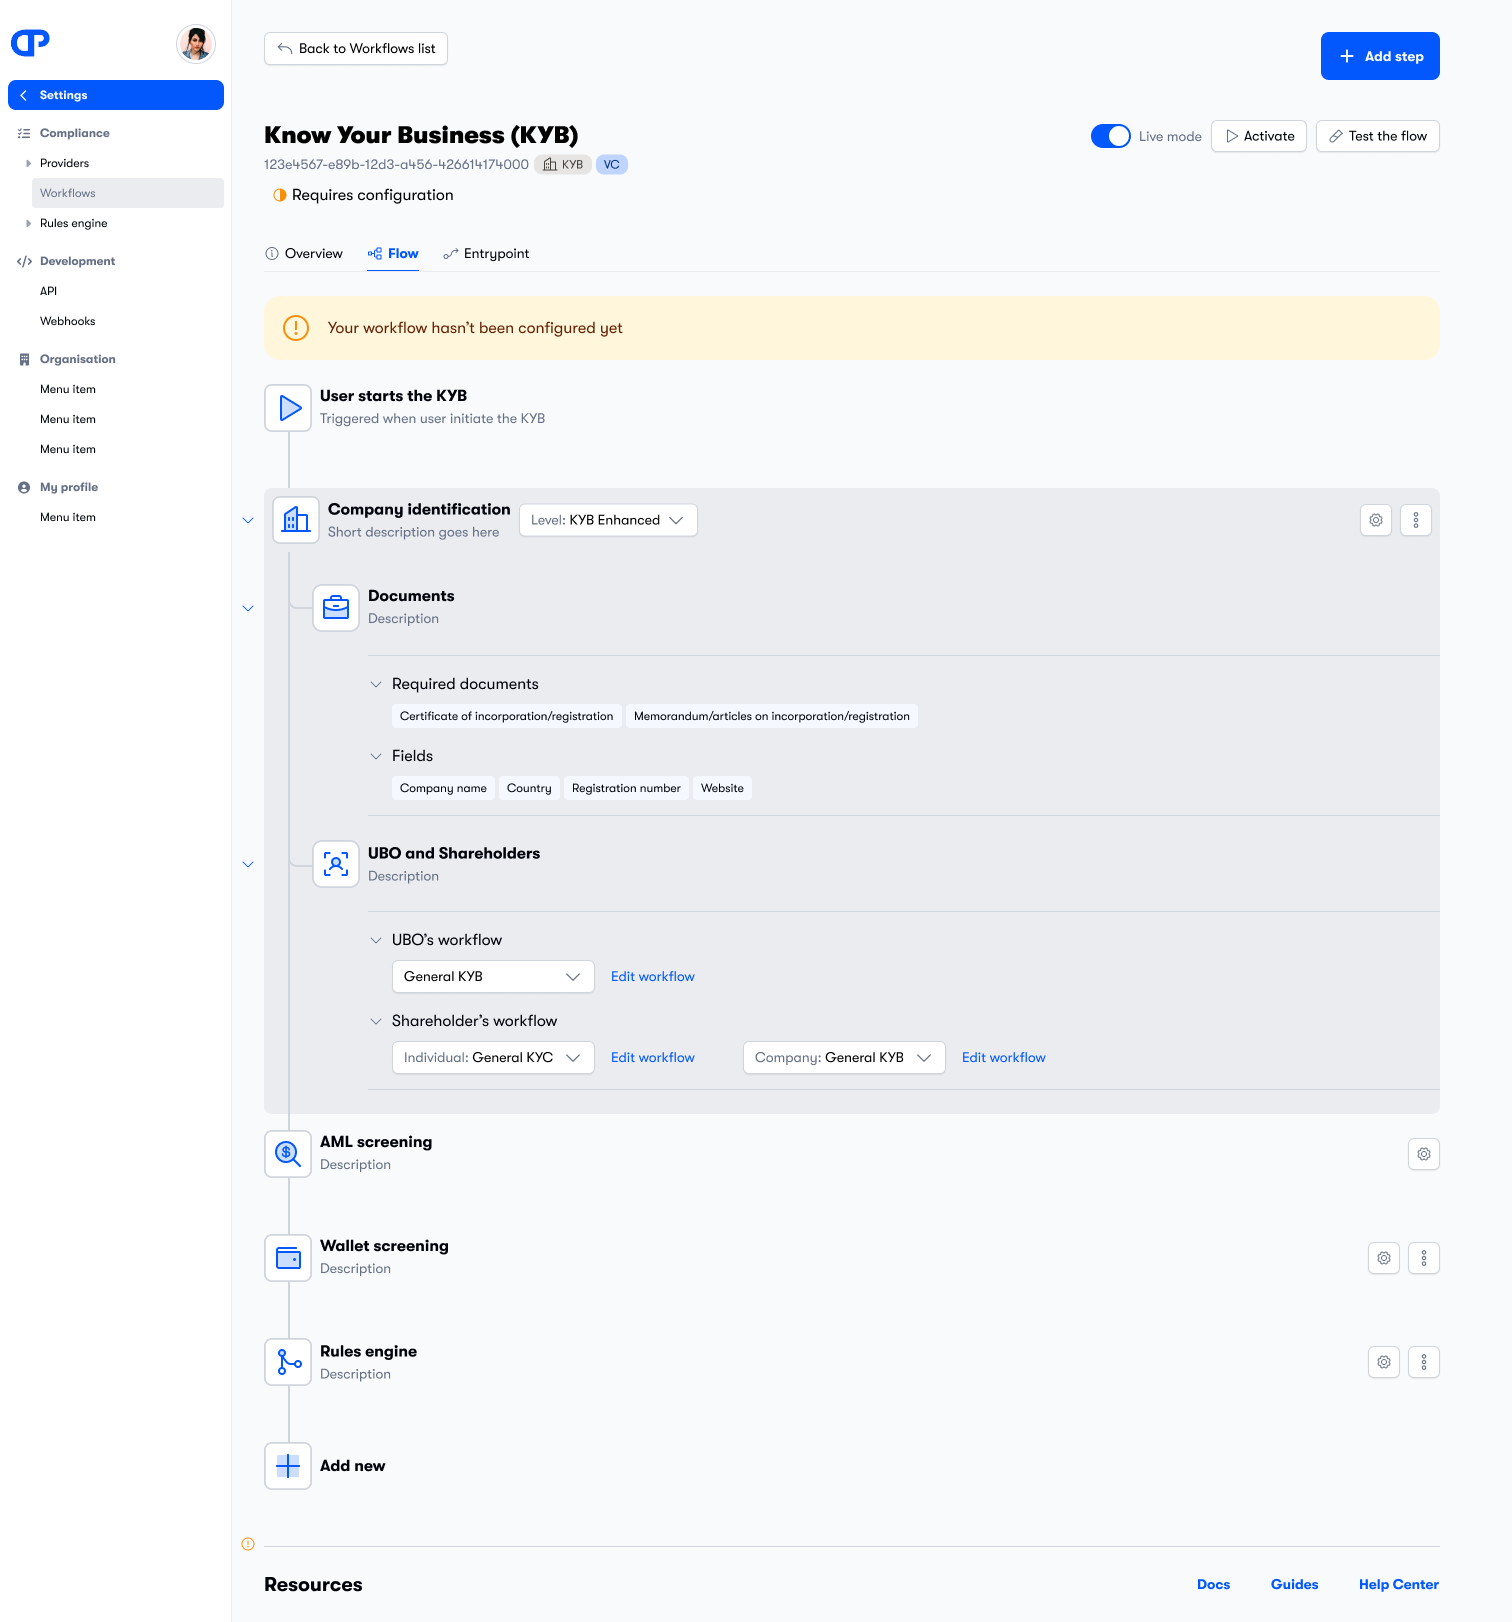
The workflow ID is displayed below the workflow name. You will need this value when using the ComPilot SDKs.
On the workflow configuration screen, you can configure, add, and delete workflow steps.
- To configure a step, click the gear icon on the right-hand side of the screen, next to the step. Steps that need configuration are marked with an orange icon.
- To add a step, click the + Add step button at the top right of the screen. If you add a step, it is automatically added in the correct place in the workflow.
- To delete a step, click the trashcan icon on the right-hand side of the screen, next to the step.
Some steps can be expanded so that sub-steps can be configured.
Most steps can trigger a
customer.updatedwebhook event. Some steps can trigger other events. For details of the webhook events triggered by each step type, see Webhook events.
Configuration
Company identification
The company identification step has two sub-steps:
- Documents where you can select what company documents are required and what fields must be in those documents.
- UBOs and shareholders where you can select the workflows that are used for the KYC on the UBOs and shareholders.
There are two additional things that have to be configured:
- appearance and security settings.
- identity verification steps.
Appearance and security settings
Appearance
Fill out the Setup the appearance form as described below.
| Field | Description |
|---|---|
| Name & website | The name of your application that uses the ComPilot Identity Widget. |
| Logo | Upload a logo to use with the widget. |
| Cover image | Upload a cover image. You can toggle the use of the image with the checkbox. |
| Branding | Select two colors for the widget that match your brand. You can also toggle the cover image on and off, and toggle the dark theme |
| Bottom content | Enter text, a website, and a link title for the bottom of the widget. |
Security settings
In the Secure your integration form, enter the URL of the host of your application. You can enter multiple URLS by clicking the + Add another URL button.
In live mode, the widget will only work with the hosts specified here (and localhost). This helps prevent unauthorised use of your ComPilot account.
Identity verification steps
ID Scan
The ID scan step requests a copy of the customer's ID for verification.
Under ID scan you can select which documents and issuing countries are accepted as proof of ID.
Filter mode determines which issuing countries are allowed.
- In Include mode, only the selected countries are allowed.
- In Exclude mode, all countries are allowed, except the selected countries.
Select the countries list to edit it.
Under Allowed documents, select the documents that you want to allow as proof of ID.
Face scan
The Face scan step takes a live selfie of the customer's face so that it can be compared with the photo in their ID, and confirm that they are a live human.
There are no configuration options for this step.
Proof of residence
The Proof of residence step requests proof that the customer is resident where they claim to be. It allows for document upload, which you need to manually check.
If document request is selected, you can select which documents are requested. You can also toggle manual address input.
Contact information
Under Contact information you can select which contact information is requested. You can use this contact information to contact the user.
AML screening
AML screening screens the customers names and address against a database of sanctioned individuals and other individuals who may represent a risk. The AML screening step is performed by one of the following providers:
There are three things that have to be configured: the API key, automation triggers, and other configuration.
API Key
The API Key pane only appears if you are using the ComplyAdvantage provider. It is not needed for ComPilot AML.contains It contains the ComplyAdvantage API key that you entered when you connected the provider. You can view the key by clicking Show and copy it to your clipboard by clicking Copy.
Automation Triggers
On the Automation Triggers pane you can:
- Toggle whether user data is screened every time a record is added.
- Toggle whether users are monitored in an ongoing manner.
If users are monitored in an ongoing manner, then users are re-screened every day. If new relevant hits are found:
- The customer status will be set to
To be reviewed. - Already opened alerts will be updated with the content of the new hit and the update will be displayed in the alert's activity log.
- If no open alert is found, then a new alert will be generated.
- On the Customer Screening tab of the customer detail page, the Is monitored field will be updated with the customer's state.
Other configuration
On the ComplyAdvantage Configuration pane you can select the lists that you want to use to screen the user. By default all the lists are selected. This provides the maximum breadth of screening.
You can also set the Fuzziness level. Fuzziness is a matching technique that allows for variation in the spelling of a search term and the entities returned in the search results. A higher fuzziness level will mean more typos or variations will be caught, but it also means that there will be more false positives. The default value is 0.5. For a full explanation of fuzziness, see What is Fuzziness?
Rules engine
The ComPilot Rules Engine allows you to define the compliance checks that a customer must pass before interacting with your application. A set of compliance checks is called a scenario
The ComPilot Rules Engine receives verifiable credentials (VCs) or zero-knowledge proofs (ZKPs) and checks them against the scenario. The application receives the rule execution result, allowing the application to allow or deny access to the customer.
This step allows you to choose which scenarios are active in this workflow. For a customer to successfully pass the workflow, they must pass each active scenario.
You can add a new scenario by clicking Add new scenario button. See Adding a scenario.
Testing
When you have completed configuration, click the Test the flow button at the top right of the screen.
Next to the workflow ID, you can toggle between Regular mode and Web3 mode. For more information, see Regular and Web3 modes.
When testing the flow, it should be in sandbox mode.
Live mode
When you are satisfied that the workflow is working correctly, make sure it is in live mode.