Rules Engine
The ComPilot Rules Engine allows you to create and edit rules that can check if customers' KYC data meets certain criteria (such as age or citizenship). Rules are grouped together into scenarios.
The input for a rule is a field from a verifiable credential (VC) or a zero-knowledge proof (ZKP).
Rules can have the following results.
- Passed means the input data passed the rule.
- Failed means the input data failed the rule.
- Not executed means the rule was not executed because the input data was not present.
Scenarios can have the following results.
- Passed means all the rules in the scenario passed.
- Failed means all the rules did not pass.
The ComPilot Identity Widget can have one or more scenarios associated with it.
The Rules Engine returns the rules execution results and the scenario execution results to your app via a webhook (see Configure data access and Webhooks). Your app must use these results to determine whether to allow the customer to proceed.
To access the Rules Engine, in the Dashboard menu, select Settings > Rules Engine.
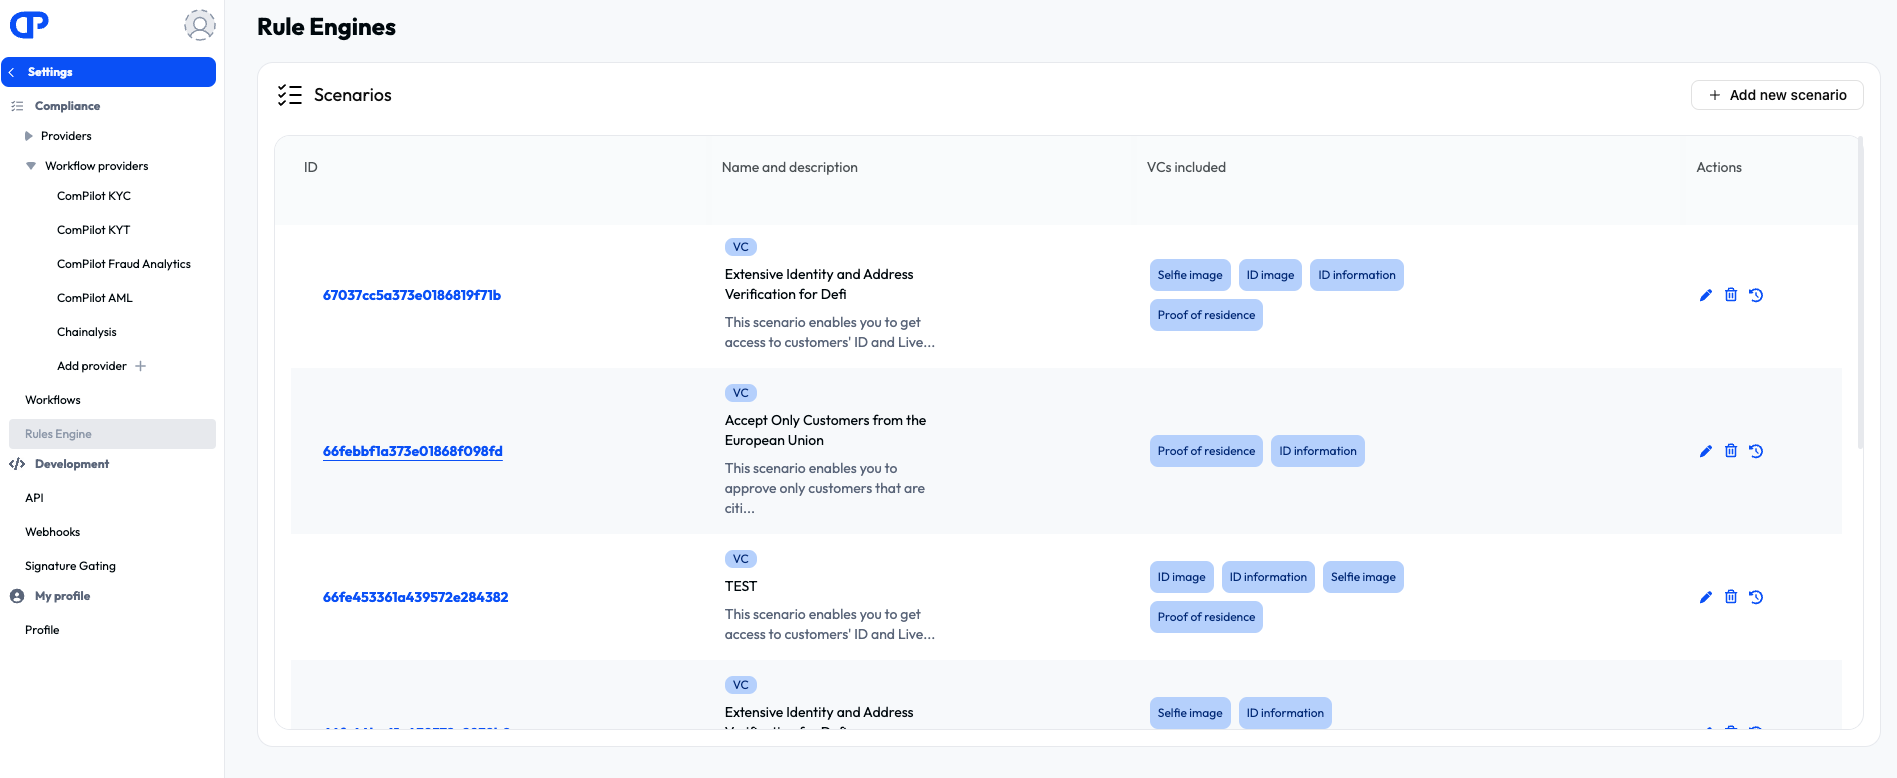
To edit a scenario, click the edit icon (in the Actions column) for the scenario you want to edit. The edit scenario screen is displayed.
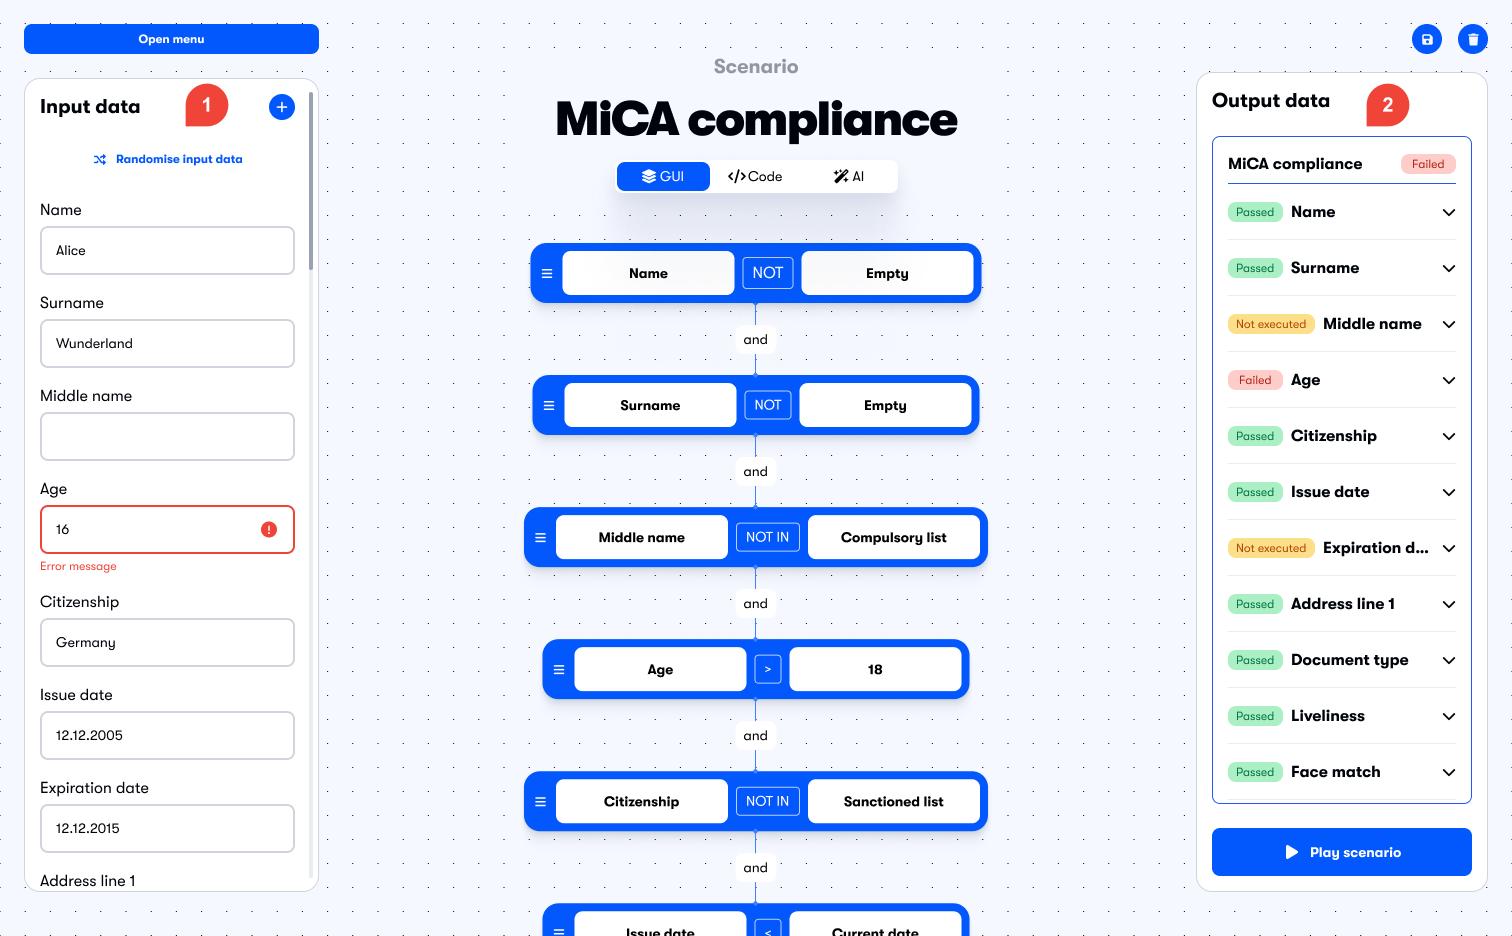
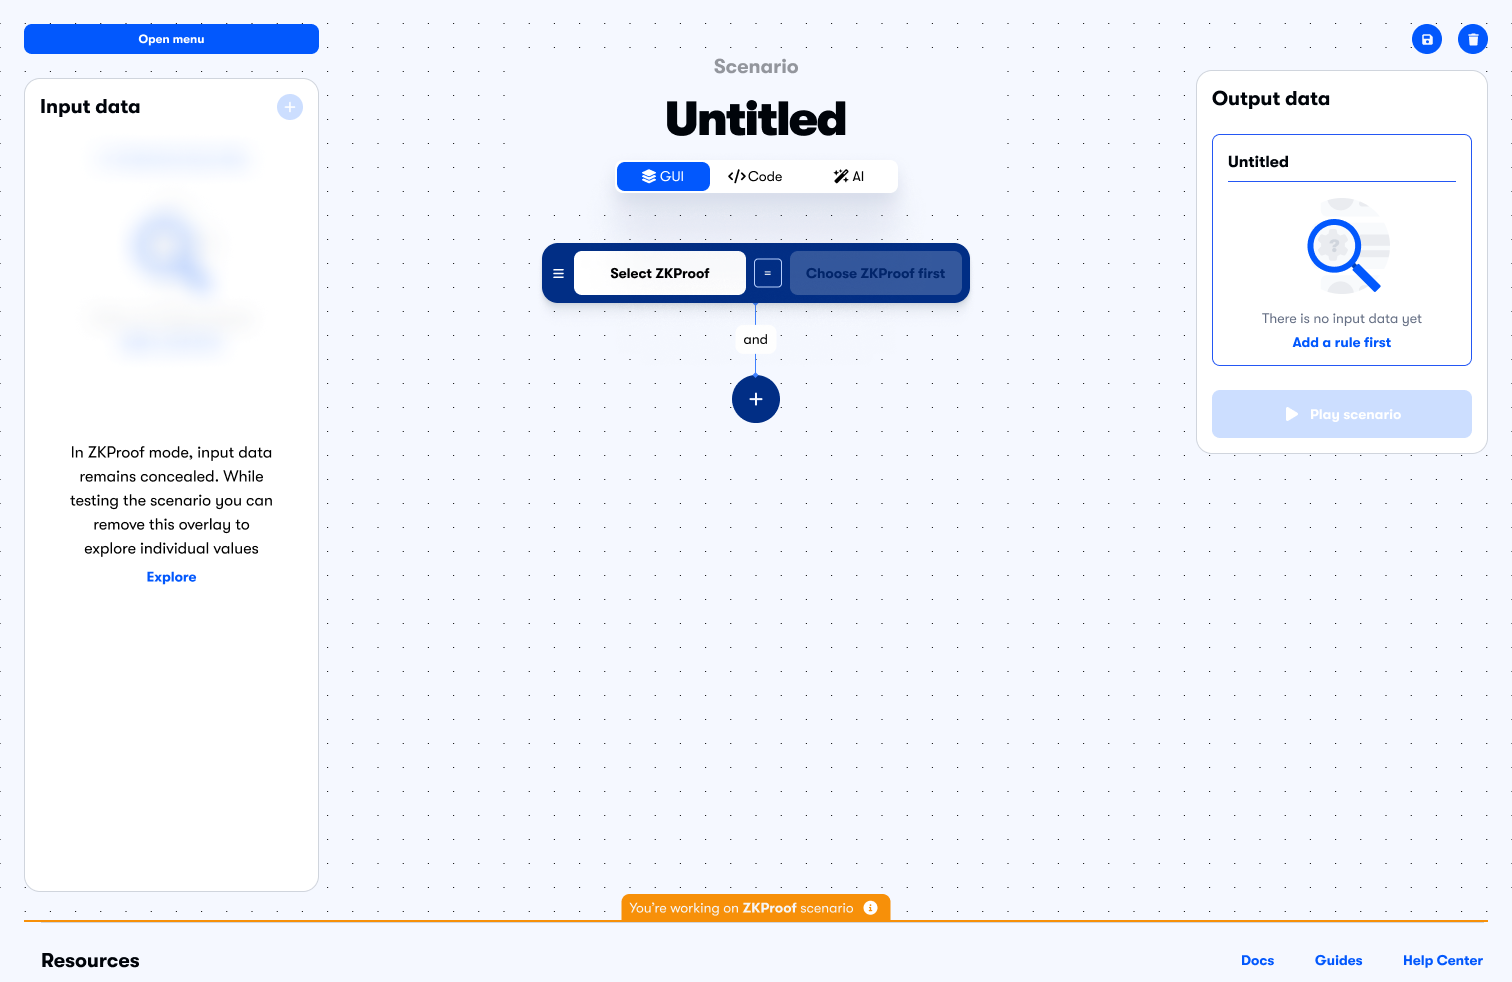
There are three panes on the edit scenario screen.
- The Input data pane on the left,
 , where you can add and edit sample data.
 - The rules pane, in the center, where you can view and edit the rules in the scenario.
- The Output data pane on the right,
 , where you can see the output of the scenario based on the data in the Input data pane.
Scenario types
VC-based scenarios
Scenarios based on VCs perform the following actions.
- They ask customers to share the relevant data.
- They confirm the veracity of the data.
- They verify that the conditions (such as age of customer) are met.
Off-chain ZKP-based scenarios
Scenarios based on ZKPs perform the following actions.
- Confirm the veracity and suitability of the underlying VCs that are used to build the ZKPs.
- Enable the customer to build the required ZKPs.
- Verify that the ZKPs are correct and that the conditions (such as age of customer) are met.
With ZKP-based scenarios, no data is shared with your application. However, if the customer does not already have VCs that can be used, they will have to share data with ComPilot to create the VCs. The customer is guided through this process by the ComPilot Widget. The Gated Uniswap example app demonstrates this.
Adding a scenario
To add a new scenario, click the Add new rule button. The scenario modal is displayed. To add a scenario based on VCs, make sure the Verifiable Credentials button is selected and follow the instructions in VC-based scenario. To add a scenario based on ZKPs, select the Zero-knowledge proofs button and follow the instructions in Off-chain ZKP-based scenario.
VC-based scenario
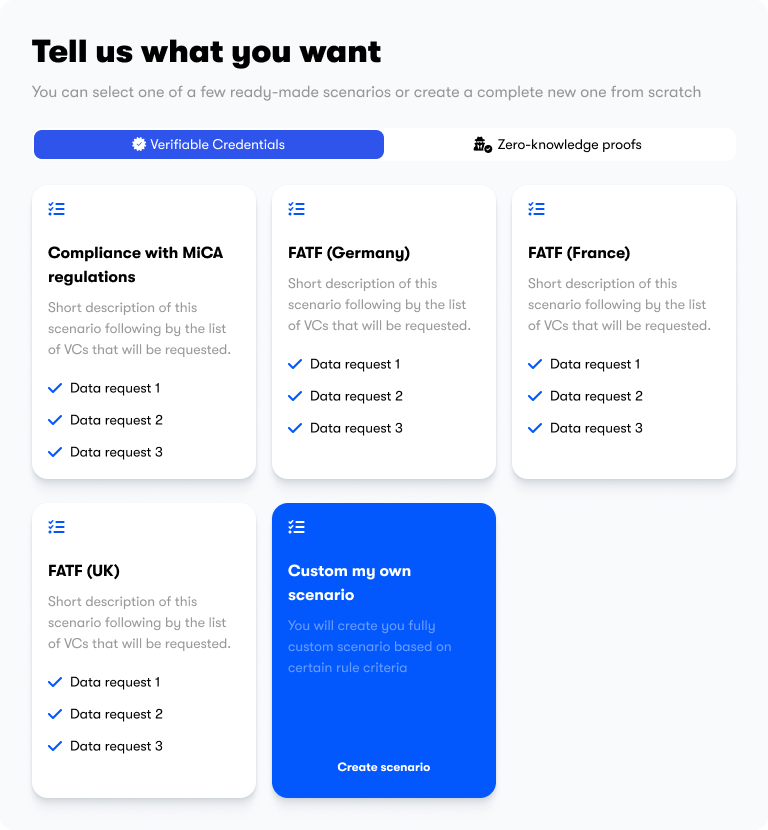
Select Create scenario to create a custom scenario, or you can select one of the predefined scenarios. If you select Create scenario the scenario creation page is displayed.
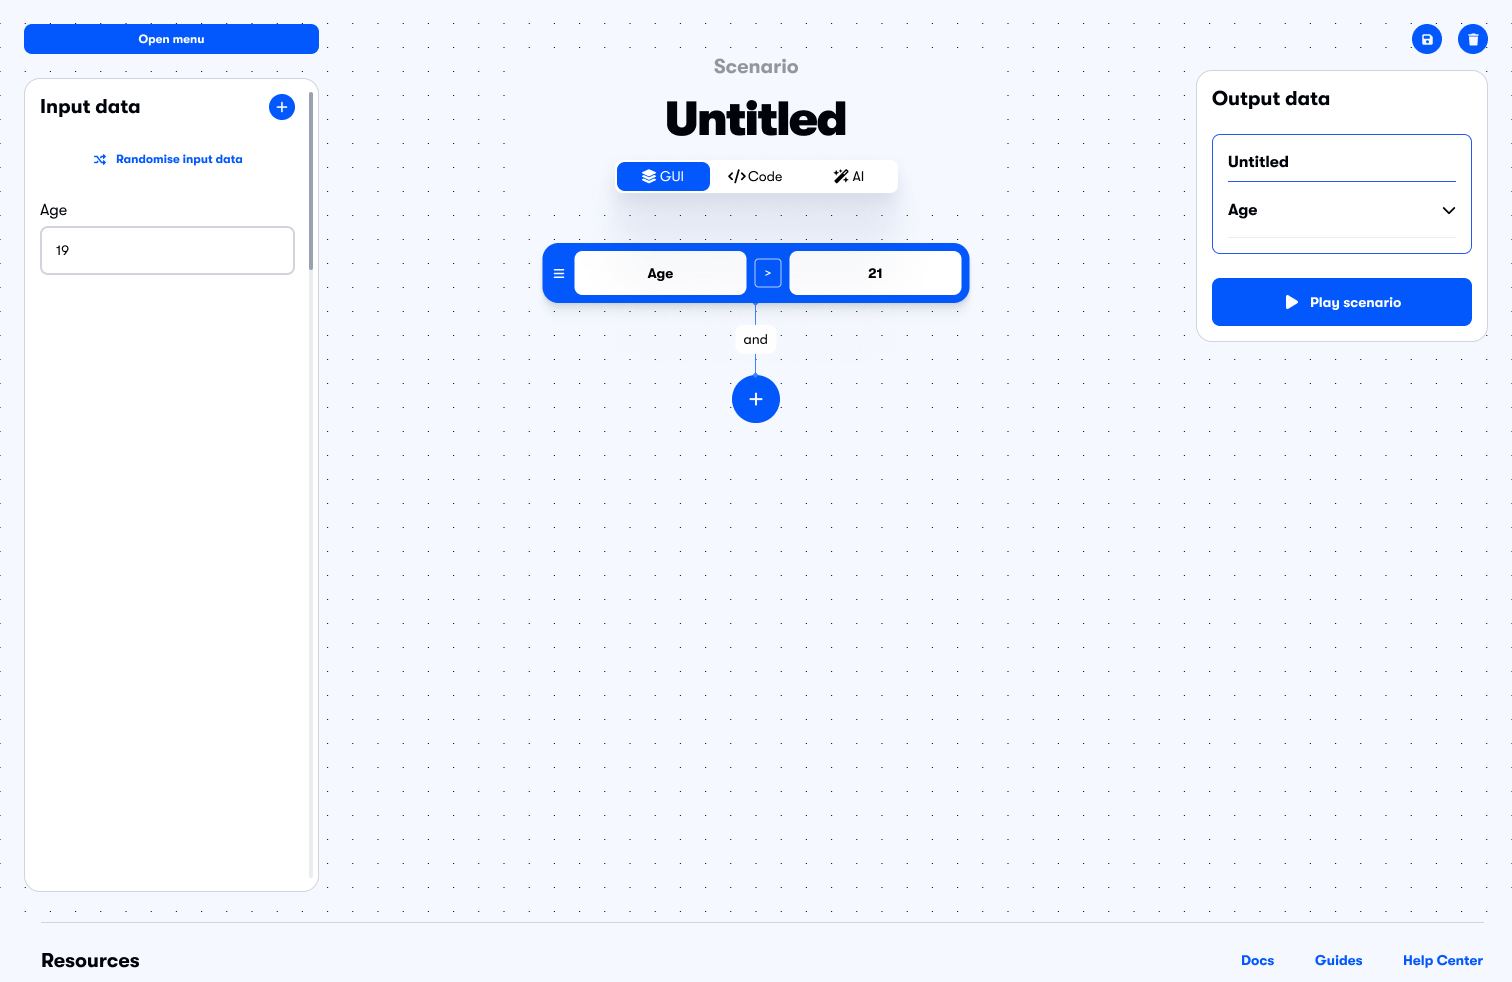
The first rule is displayed in the center of the screen. On the left, you can select which field is used for the rule. On the right, you can set the value for the rule. In the middle, you can select the operator that is used to compare the field to the value. In this example, the rule is that the customer's age must be greater than 21. When the rule is complete, click the save icon.
You can add a rule by clicking the plus symbol (+).
The rules determine what information is requested from the customer.
Rules are combined using "and", which means all rules must pass for the scenario to pass.
You can test the rules and the scenario as you create them, by entering data into the Input data pane on the left of the screen and viewing the results on the Output data pane on the right of the screen. See Testing a scenario, below.
You can rename the scenario by clicking the scenario name and editing the text.
When you have finished adding rules, click the save icon at the top right of the screen to save the scenario.
Off-chain ZKP-based scenario
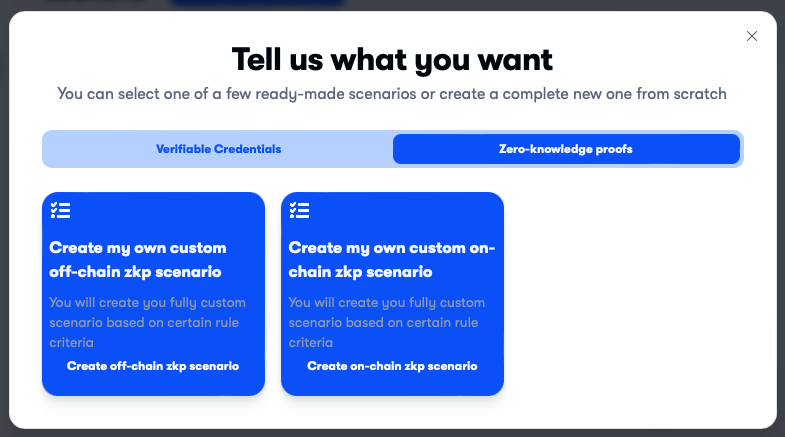
Select Create my own custom off-chain zkp scenario to create an off-chain scenario. The scenario creation page is displayed.
The first rule is displayed in the center of the screen. On the left, you can select which ZKP is used for the rule. On the right, you can set the value for the rule. In the middle, you can select the operator that is used to compare the ZKP to the value. When the rule is complete, click the save icon.
You can add a rule by clicking the plus symbol (+).
The rules determine what information is requested from the customer.
Rules are combined using "and", which means all rules must pass for the scenario to pass.
You can rename the scenario by clicking the scenario name and editing the text.
When you have finished adding rules, click the save icon at the top right of the screen to save the scenario.
Editing a scenario
To edit a scenario, go to the Rules engine page and click the edit icon (in the Actions column) for the scenario you want to edit. The edit scenario screen is displayed. It is similar to the scenario creation page, as described above.
Testing a scenario
You can test a VC-based scenario while you are creating or editing it. This is done using the Input data ![]() and Output data
and Output data ![]() panes on the create scenario and edit scenario screens.
panes on the create scenario and edit scenario screens.
The Input data pane shows example data that is used as input for the rules. You can either manually add data to the fields or select Randomise input data to populate the fields with random data.
Click the Play scenario button at the bottom of the Output data pane. This will run the scenario and the results of each rule and the scenario will be displayed.
Rules can have results of Passed, Failed, or Not executed, and scenarios can have results of Passed or Failed.